MIDIPlayer X QuickStart
◉ Installation
If you purchased MIDIPlayer X through the Mac App Store, MIDIPlayer X will be installed in your Applications folder.
◉ Loading MIDI Files
Load MIDI files into MIDIPlayer X using several Mac friendly methods:
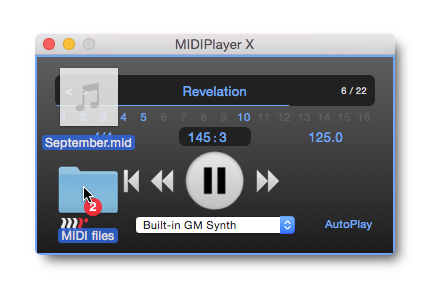
- Drag and drop a MIDI file, files, or folders containing MIDI files onto MIDIPlayer X’s window.
- Drag and drop a MIDI file, files, or folders containing MIDI files onto MIDIPlayer X’s app icon.
- Use the standard File>Open or File>Open Recent menu options.
- Use the Finder's Open With command by control-clicking on a MIDI file and selecting MIDIPlayer X from the Open With menu.
When using drag and drop into MIDIPlayer X’s window, the window frame will highlight when a readable MIDI file is dragged into the window.
◉ Display
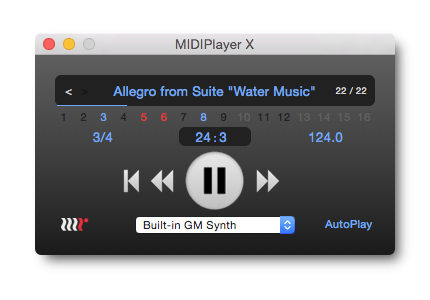
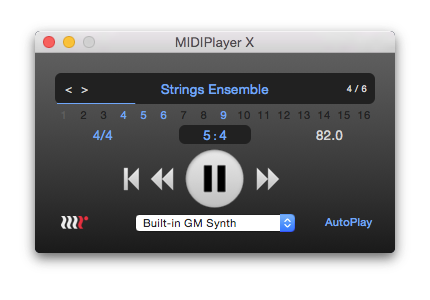
Once a file is loaded, MIDIPlayer X’s display will indicate several types of information:
- The MIDI file’s title, if the author included one, or its filename if not.
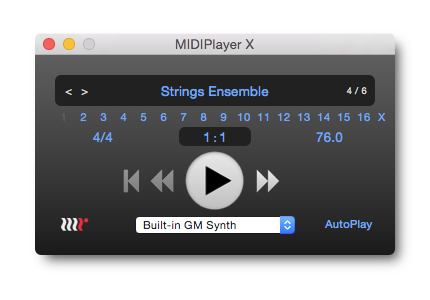
- If multiple files are loaded:
- Previous / Next file buttons will show left of the title
- Current and total file count will show right of the title
- MIDI channels present in the file will be highlighted by the 16 numbered channel indicators under the title. Blue indicates that channel is present in the file; grey indicates the channel is not used in the file.
- System Exclusive message are represented by the “X” to the right of 16. This will flash during playback if / when a SysEx message is sent by the file.
- The file’s time signature and tempo. These will update if the file includes changes.
- The counter will be set at bar 1, beat 1.
- The currently selected MIDI Output to which the file will play.
- The current AutoPlay status.
◉ Selecting Files
If multiple files have been loaded, you can cycle through your file list using:
Previous | Next (key commands: command -[ | ])
- Press the Previous or Next button to move to the previous or next file.
- If AutoPlay is ON, the newly selected song will begin to play.
◉ MIDI Output
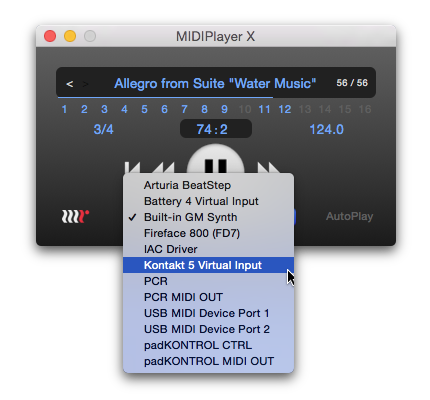
The MIDI Output menu will display all available MIDI outputs that the file can play to. These MIDI Outputs come from three sources:
- MIDI Hardware: As configured in your Mac’s Audio MIDI Setup (AMS) studio setup. The AMS utility is pre-installed on every Mac, and should be found in Applications/Utilities.
- MIDI Software: Apple provides their IAC Driver (Inter Application Communication) to allow simple MIDI communication between MIDI software applications. The IAC Driver must be enabled in your AMS studio setup. If the IAC Driver is enabled and it is selected in MIDIPlayer X's output menu, any and all MIDI applications that can receive MIDI will receive MIDI from MIDIPlayer X.
In addition to the IAC Driver, some MIDI software may publish its own virtual MIDI input which MIDIPlayer X can use. Any available virtual inputs created by other MIDI software will also appear in the menu. Depending on the other software, their virtual input (which MIDIPlayer X will see as an output it can send to) may be automatic, may need to be enabled in a preference setting, or may not be available at all. - MIDIPlayer X: MIDIPlayer X also includes a built-in General MIDI-compatible synthesizer using Apple’s CoreAudio technology.
You can open AMS quickly using the menu shortcut Window>Audio MIDI Setup.
◉ Transport
AutoPlay (key command: option-A)
AutoPlay has three modes indicated by the color of the AutoPlay button:
- Off (Light Gray): MIDIPlayer X waits for you to start playback with the Play button or key command.
- Repeat (White): MIDI playback begins immediately after the file is loaded or selected. When the current file reaches its end, it will reset and begin playing from the beginning.
- Advance (Blue): MIDI playback begins immediately after the file is loaded or selected. When the current file reaches its end, it will advance to the next file and begin playing. When it reaches the end of the last file, it will loop around and begin playing the first file.
Once paused, AutoPlay has no effect until the next file is loaded or selected.
When only a single file is loaded, Repeat and Advance modes function the same.
Play | Pause (key command: spacebar)
- Press the Play button to start playback; press it again to pause.
Rewind and FastForward (key commands: ← | →)
- Press to move one measure in either direction. Can be pressed while playing or paused.
Reset (key command: return)
- Returns the MIDI file to its beginning. Can be pressed while playing or paused.
Tempo (key commands: ↑ | ↓)
- Adjusts the tempo up or down.
- Step through small changes, or simply hold the up or down key for larger changes.
- The tempo will display as light gray when you have changed it from the file's original tempo.
- Double click the tempo to reset it to the file's original tempo.
- Tempo changes can be saved to a new file.
◉ Rewind and Fast Forward
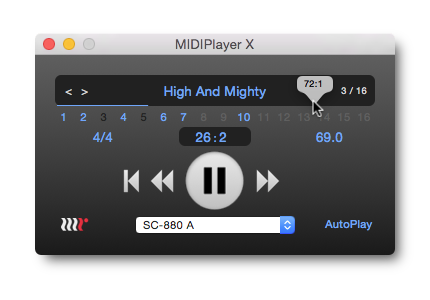
In addition to the buttons and key commands, you can move forward and back within the song by clicking within the black title/filename display.
- Click in the display to move to that relative position in the song. For example, clicking near the midpoint directly under the title will move to the midpoint of the song.
- Drag in the display to reveal a popup counter indicating the time of your current drag position for precise song location.
◉ Counter
Time format (key command: option-C)
- bar : beat: Displays elapsed time as standard bars and beats.
- min : sec: Displays elapsed time as minutes and seconds. This tracks the tempo track so elapsed time will change if the tempo is changed.
The counter's format can be switched by selecting from the Controls>Counter menu, simply clicking on the counter, or by the above key command.
◉ Channels
The channel indicators will show one of four colors reflecting their current state:- Blue: channel has MIDI events and is active.
- Black: channel has MIDI events but not at the current song position. This is the normal state when the player is paused.
- Gray: the song does not contain MIDI events on this channel.
- Red: the channel is muted.
Mute
- Click on a channel number to mute that channel.
- Click the channel again to unmute it.
- You can mute multiple channels.
- Shift click on a channel to mute or unmute all channels.
Solo
- Option click to solo a channel.
- Option click the channel again to unsolo it.
- After soloing a channel, you can unmute other channels by clicking on them, as above.
- You cannot mute a solo'd channel. You can, however, mute all channels as above.